Monday, January 21, 2013

The Much Hated Message Board

The boyfriend picked up a message board about a year ago at a thrift store. I think he paid about $3 for it or somewhere thereabouts. Never really needed one and thought this was the ugliest thing to ever come out of the 80s...aside from the stirrup pants, of course. But the 80s are just that...memorable for the music, much of the rest remains somewhat questionable.

So, much like anything else, over time it became ugly and dated. But for some reason he seemed to need it...and felt the urge to actually use it (in which hiding it under the bed wasn't looking like a plausible option). So with a losing battle on my end ..and in the spirit of compromise, I pouted a little and whined a lot. Then I grabbed some supplies and got to work. :)


I pulled out all the hooks and the metal grapes (yes, you read that correctly), filled all the holes with wood filler and sanded it all down.


I taped off the cork and chalk boards and started painting. I spray painted with a primer and then an ivory color (I was all outta white). It took about 3 coats and then I roughed up the edges a little with some fine grit sandpaper. 


As a last touch I decided to paint the corkboard black to match the chalkboard.


I hung it, I stared at it for about 10 minutes, I cleaned the kitchen, fed the cat, grocery shopped, came back and stared at it for another while...then decided I absolutely hated it.

So I mixed up a bunch of colors until I got a color I loved and voila!


The color is a mix of something in between teal and turquoise. I grabbed some scrapbooking paper and covered the backs of the mail slots. It made a nice contrast I think. I'm still using the old hooks but painted them white until I find something else.


I think I can live with this for now...I kinda love it. :)

Thursday, March 15, 2012

Loose Tea Teabags

I was never much of a tea drinker but ever since David's Tea opened up shop here last fall, I've gotten into a huge tea drinking kick . They have so many great flavors and all different types of tea. I love that they offer samples and have such knowledgeable staff. I got the diffuser and a bunch of teas to try. Have been totally in love with it ever since. The only issue I have is tea on the go. I didn't want to spend $30 on a special travel mug. It's trendy and cute but a waste of money for me. So I decided to spend a lot less money and a little time to make tea bags for my loose tea. Now I can have yummy tea in my regular old travel mug whenever I like. Also, I can throw a few teabags in my purse and take them wherever I go.


First thing I did was buy some cheap round coffee filters for less than $2. I cut two squares of the same size (one from the center of each filter). I cut the squares about the size of regular tea bags, but how large you make yours really depends how strong you like your tea I suppose. I find 1 full teaspoon is usually enough for me.


Next you'll want to sew three sides. You can hand-stitch but it would be much, much quicker with a machine. Leave the fourth end opened to spoon in your tea, then stitch that up as well.


That's it! The tea bag is finished. But if you want to add a little something extra you can attach a string (I used cross stitch floss as it is a little thicker than thread). Fold the corners in, place the string in the middle of the fold and staple it. At the other end of the string, attach a piece of scrap paper with the flavor of the tea written on it. You may find that you need to make a knot in the string at each end around the staple, unless you get a good hold first time around.

Sorry...as always I forgot to to take 'during' photos. Someday I promise I will remember and show you proof that I do, indeed, own a sewing machine. :)


And of course, being who I am, once I'm done with a teabag I remove the string and tag and reuse it on the next ones I make.

Now you, too, can enjoy a great cup of tea everywhere you go, without the bother or the mess of a diffuser...or the expense of a special travel mug. :D

As always, comment and subscribe. :)

Tuesday, March 13, 2012

Cutest pincushion ever!

I have been complaining for the last few weeks that I have no pincushion and I can never find my stickpins immediately when I needed them. That said, I don't sew much and therefore, don't have many pins to find. Ha! Nevertheless, I had a few minutes today and all the supplies I needed so I got to work.


As much as I would love to, I can't take credit for this idea, though the work is entirely my own. And by now, any of you following my blog knows I'm terrible at 'before' pictures and not so great at 'during' pictures either. At times I'm lucky to just have the follow through and finish the damn project. So expect pretty things but not many pictures! :D

As I said, the idea was not my own, though I did change it up just a bit. I got the idea from this wonderful blog that I follow!  Make It and Love It


I started out with a little Mason Jar that used to hold a gorgeous smelling soy candle that I bought from a local retailer. The candle was all used up so I washed out the jar and air dried it.


I grabbed a piece of cotton batting, balled it up and glued it to the top of the lid (right side up). Found two small scraps of fabric that were just bigger than the lid. Wrap one of these pieces around the batting and lid. Secure with glue on the underside and make sure the fabric is taut, remember you still have to place the ring around this and screw it back onto the jar. Too much bulk and you're gonna have issues. You don't have to glue the batting to the lid but it's much easier to wrap the fabric around something that doesn't keep moving. Now the underside of the lid is gonna look rather messy. If you're ok with that, then all the better. However, if you aren't then you can cut a circle (like I did) just smaller than the lid from the second piece of fabric and glue it to secure and cover the messiness.

*Behold a picture!


All done! Now fill your jar with whatever you like and put it all back together. Stick your pins on the top of your brand new cute-as-a-button pincushion! :D


As always, comment and subscribe! :D

Sunday, March 11, 2012

Pillow Talk ;)

Got an old body pillow ya don't use or don't have room for? Don't have enough regular pillows? Cut the sucker in half!

OK I got ahead of myself on this project and I apologize. I forgot to take a before picture. But if you don't know what a body pillow looks like, chances are you don't already have one and therefore are not going to cut it in half. So, that said...let's carry on with the project shall we?

This one happened to be filled (and I do mean filled) with feathers. A whole lovin' shitload of feathers. 
For a minute my craft room was looking like a pillow fight scene from a movie. Maybe yours will be filled with polyester...or anything else that, once cut into, your cat doesn't try to leap in thinking you're making lunch and it's fair game. In that case, congratulations! Your job will be much easier. That or you don't have a cat in which case, just ignore my ranting.

So to start, I folded the pillow in half and shook the bejebuz out of it. This helped to settle the feathers into either side and away from the center which I would be cutting. Less mess, I thought, until the cat found me. Anyway, shake it...a lot. Then, if you need to (I needed to) draw a straight line where you want to cut, to keep you on track. Feathery pillows tend to move and frustrate you as you cut and you spend more time poking feathers back in than actually watching where you're cutting. If your pillow is kinda flat and lifeless, you can always make one really nice, plush pillow out of it by letting it all sink to one end and cut off the excess.


Once you get it cut and poke the 3 million feathers safely back inside of the pillow, you will want to fold the cut ends in, making sure to allow enough for the seam. I left about an inch or so, to be safe. Stick a bunch of pins in it to hold the fabric in place. Oh and I forgot to take a photo of that too...my bad! This is also about the time where I realized I do not have a pin cushion (*gasp* who doesn't have one of these delightfully useful things?? Me!).


Clear off lots of space to start sewing. I used my machine (which is a useless box of plastic and metal, hopefully you have a better one) or you could also sew it by hand. In hindsight, sewing by hand probably would have taken me less time and made straighter lines than my machine. Ahh well! C'est la vie! Last thing...if yours has feathers, take the finished product outside and beat the life out of 'em. Against the side of the house, a tree or with a broom...whatever works for you. But get all those loose feathers off the pillow and out of your house!

Now you have two new-ish pillows! Or a bunch of feathers with a cat laying in it! Either way...happy weekend! Now go take a nap on your loverly, squishy new pillows...or snuggle with the cat. :)


Monday, December 12, 2011

10 minute Christmas centerpiece

I was all done decorating for the holidays...and realized I had nothing Christmas-y on my table! I'm kind of a minimalist when it comes to Christmas decorations. I think less is more (except on my tree lol). However I've moved a few times in the past 3 years and in the midst of all that packing, moving, unpacking...you tend to rid yourself of clutter, extra things you don't really need, anything that doesn't hold sentimental value and can be replaced, anything overly heavy...you get the picture. I'm sure you've all been there! So here I was, no centerpiece (though my tech savvy, table hogging boyfriend couldn't be happier about that ;P) and I didn't want to go out and buy anything. Blah! So I looked around and came up with something that used things I already had and costed me nothing! My favorite kind of creations! :)

I had a decorative bowl that really has no use other than to look pretty on the bookcase, a few silver and white balls leftover from the tree, a bow that I had leftover (that I didn't have to make!! Phew!) a few holly berries, a pinecone and I snipped a piece of garland for a touch of greenery. Smacked it all together and laid it out on a table runner that I never use. Voila!


I think it turned out pretty good for 10 minutes and a little creativity! Excuse the photos, it's a Smart Phone day ;)

Sunday, December 11, 2011

Wreath anyone?

I bought a pine cone wreath at the thrift store last winter. God love the ones that put all the effort and work into something and then give up on it and give it away. lol I picked it up as soon as I saw it, I knew I'd need a wreath by Christmas and I'm too cheap to buy one already done. So this was the best of both worlds. Cheap & unfinished but the hard part already done. :D

So I paid maybe $1 for this, then I bought a few silver/white leaves and holly berries for about $0.50 and a huge spool of wired ribbon for $3, all at the thrift store.


Dad was throwing out a bunch of old Christmas things he doesn't use and is tired of storing so I snatched up the wreath hanger. I put this wreath together in about 10 minutes (minus my thousand attempts and failures at a good bow) and in my haste, forgot how ugly the old brass hanger was (no picture was taken but I'm sure you've all seen them, terrible things!) So I covered it in ribbon, last minute kinda thing. Haha!
 And here's the result. I was going for a wintery, snowy kinda wreath...not too overdone or full of color. This picture reminds me of how bad I am at making bows. Ahh well! My first wreath! Come to think of it, it's a little small, next one needs to be much bigger! :)


So..how did I do for my first attempt? Did you ever make a wreath, if so how did it go?

Saturday, December 10, 2011

Penguin Christmas Cards


So I got a text from a friend of mine about a month ago. She wanted me to make some Christmas cards, something different and preferably with a reindeer or penguin theme. My first thought was 'oh crap...I don't have any stencils or stamps for either of those.' Then I frantically started looking online for inspiration. I decided right away it would be penguins cause I love them and nothing is cuter...I swear! And the rounder they are, the better. :)
I found soooo many possibilities...if I had a machine or punchers to do the work for me. But alas, I am a poor little crafter. So I looked for something that I could make my own stencil from.

Then I found this! Instant love! Penguin Love!

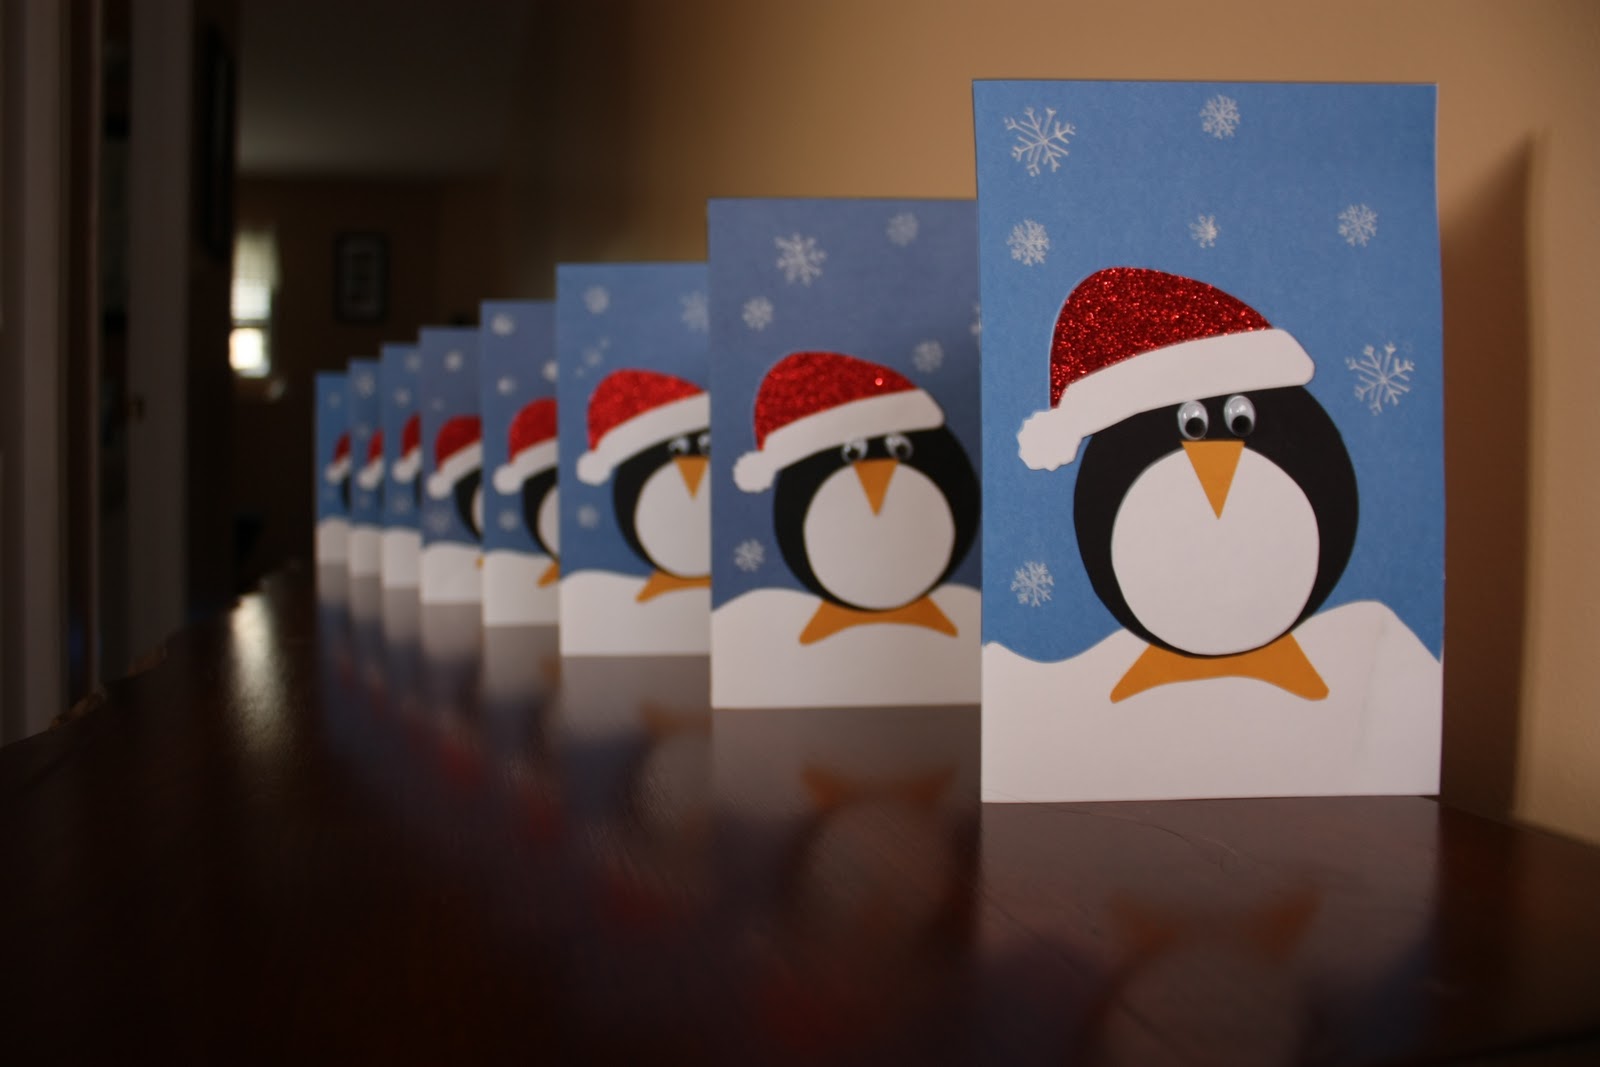
So I free handed a stencil based on this, added some bling to his hat and some googly eyes for fun and came up with this! A chubby Santa Penguin sitting atop a hill of fluffy snow! :D


I made 8 of these loverly penguins and stuck them on blue paper, which was actually stuck to white cardstock. I got the red glitter cardstock (for the hats) at Michael's. I totally fell in love with it and have promised myself that I'm going back for more as soon as I find a reason to need it. ;) I couldn't find the right color paper for his beak and feet, and my clever boyfriend came up with the brilliant idea to use one of those big yellow envelopes. It was the perfect color! Stamped some snowflakes on the blue background with white ink and that's it! A little time consuming but oh so darn cute!


I had to make 8 of these penguin cards...so it didn't take too long once the planning and cutting stages were over with. And I had tons of fun making them. And she loved them so that was what I was aiming for. :)
I stamped a Christmas-y message on the inside but, of course, forgot to take a photo of that :P